Our showroom is open to the public 9-4 MF, Saturday 10-3 | Call: (514) 708-1449
Autoconstruction

All our models are available for DIY.

Get professional support every step of the way.

Our models are available for delivery anywhere in Quebec.
Autoconstruction in Six Steps
See How You Can Save Big, Knowing That You’re Well Looked After, Of Course!
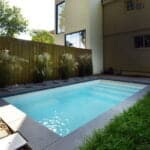
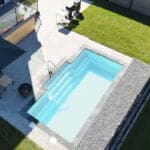
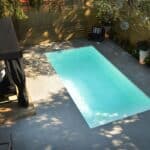
Piscines Nautika offers everything you need to self-build your dream pool. All our pool models can be installed in a single day, saving you time and money, not to mention minimizing the damage caused by in-ground pool installation. Nautika pools adapt to all types of soil, offering you maximum possibilities.
Our “Auto-contractor” solution is easy to install, every step of the way. Throughout the process, you’ll be able to contact us to get answers to your questions, or to confirm certain key steps. If you think it’s too complex, our installation services are always on hand. Whatever you decide to install, the steps described below are the same, whether you take care of it yourself or leave it to our master installers…
Here are the 6 typical steps of a Piscine Nautika installation in one day.
When morning comes, you’ll need a transit level, an adequate load of 0.5-inch net crushed stone, the supplied MIRAFI geotextile membrane and the 10-inch-diameter dewatering well, which is an integral part of the equipment supplied with your Nautika pool.
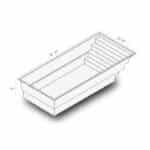
1. Site Excavation
- It is important that when the pool is excavated, it exceeds the overall dimension of the pool by 8 inches.
- Depending on the type of soil on which the installation will be carried out, the excavation depth should exceed the depth of the pool supplied by 6 to 10 inches.
- In the case of clay soil, an excess of 10 inches is recommended. If, on the other hand, the soil is sandy or rocky, we suggest 6 inches of excess.
- To facilitate installation of components such as the skimmer and dewatering well, it’s important to excavate higher than the pond.
- Once the basin is in place, it’s important that the final level exceeds the perimeter of the adjacent lot by 6 inches.
2. Preparing the Stone Bed
- Once the excavation is complete, you’ll need to spread the supplied geotextile membrane over the entire excavated space.
- The membrane should then be covered with a bed of crushed stone, specifically what is known as 0.5″ net.
- You’ll need to ensure that the final stone bed is 6 to 10 inches thick, and certainly this will need to be determined before proceeding with the excavation.
- Before proceeding to the next step, use the transit to check that the stone bed is uniform and level.
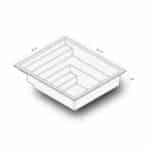
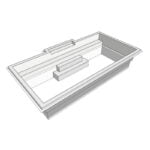
3. Basin Installation
- Care must be taken when lowering the basin to avoid damaging the piping and skimmer.
- Once the basin is in position, you’ll need to check that the bottom is properly seated on the bed of crushed stone.
- Take care to use the transit again to ensure the final height and level of the basin.
- Once everything looks right, you can proceed to fill the bottom with water.
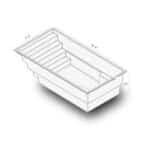
4. Backfilling Around the Basin
- The next step is backfilling. It’s important to fill the basin with a few inches of water before starting, to give it more internal weight before proceeding.
- You’ll need to fill the void between the basin wall and the excavation wall with 0.5″ net crushed stone. Make sure you don’t use sand when backfilling, as it can compact in the medium term and contribute to destabilizing the sidewalk.
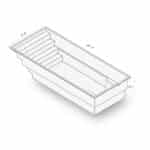
5. Installation of the Drainage Well
- You’ll need to install the supplied 10″ diameter perforated drain.
- Next, determine the location of the drainage well. It’s important to position it around the deepest part of the bassin, and between the bassin and the excavation.
- Note that the drainage well must be 10″ deeper than the bassin.
6. Connecting the Plumbing Components
- All you have to do is connect the supplied piping to the filtration system, the suction hose and the push hose.
- No adjustments are required to the pond piping, as everything has been assembled and checked beforehand at our manufacturing plant.